


by Jeff Andrews, Northern Tails Sharpening

Most groomers apply too much oil when oiling clipper blades. If you over oil it drains through the teeth and onto pet coats. Some groomers turn to other forms of lubrication like Spray Coolants, Rem Oil or WD-40. I do not recommend them.
Blade oil is the best form of lubrication. It stays on blades preventing friction, heat and pet dander buildup on cutting surfaces. Coolants, WD-40, and Rem Oil evaporate quickly leading to friction, heat and the destruction of cutting edges in a short time. These products can also cause health issues if you don’t wear the recommended safety gear. The list of safety gear you need to wear while spraying these aerosols are listed on the back of the can. Most contain denatured alcohol which can be poisonous if inhaled. Always read labels for your safety. Oil is safe.
There are four points of a blade to oil but you only need to oil three of the four once-a-day. However, if you wash a blade between grooms you need to oil all four points before using the clean blade. Oiling may seem difficult at first. With practice you will be a natural soon enough and glad for it. On the next page you will find pictures with my instructions to help you reap the benefits of proper oiling.
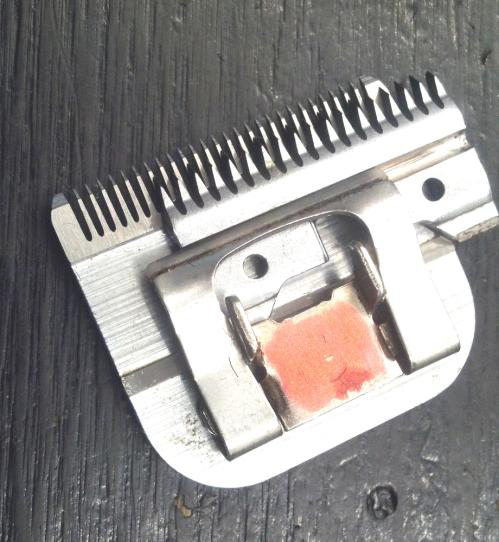
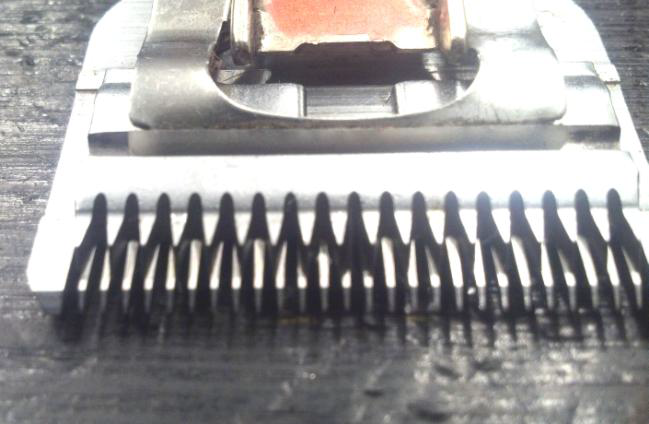
First, push the cutter out to either side so that spring is lined up with the notch in the cutter. You should be able to see the rear rail on both sides of the spring. Now you can access the first three points with oil.
Start by putting one tiny drop of oil on both rear rails. The first tiny drop goes on the rear rail just outside the left spring as shown and another on the rear rail outside the right spring where sliding the cutter over provided access.
Apply a third tiny drop in the groove on the top of the cutter. If you don’t oil this groove at least once-a-day your blade may make a screeching sound and not cut properly. Without oil a dry blade guide causes the cutter to hesitate. It may even cause the blade to cornrow and other problems.
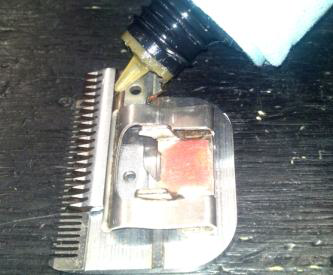
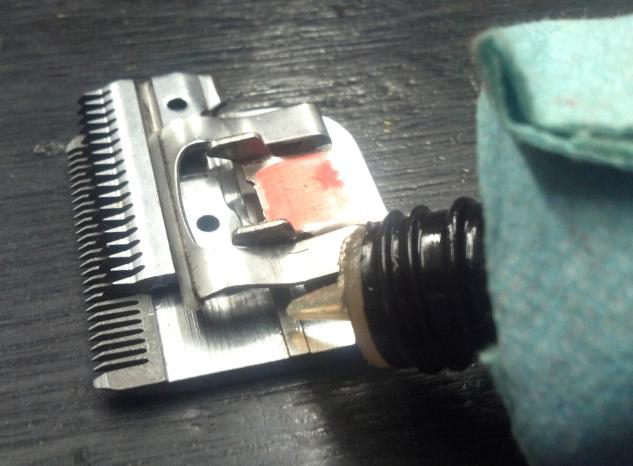
Next push your cutter back to the center of the blade. You can place the fourth drop on the cutter teeth while resting on the table or after placing the blade on a clipper. I prefer to oil the teeth while the blade is on a clipper. That way I can start the clipper up right away and spread the oil across the cutting surfaces immediately. Oiling teeth has to be done every time you put a blade on your clipper. Why? Because the dog hair you are cutting removes oil from blade teeth. The first three points do need to be oiled again in the same day unless you wash the blade.
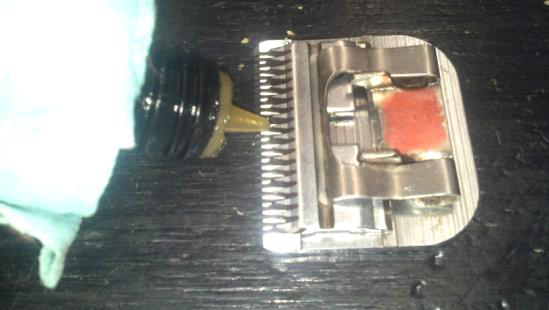
Whether resting on a table or on a clipper, put one tiny drop of oil in the center of the blade on the cutting surface. Never run a bead of oil across the teeth. It will seep through the teeth and get oil on the coat. Start the clipper and let the oil spread as a thin coating across the blade. That’s all you need.
As you can see in the picture the drop of oil is very small. When it spreads across the blade it will stay there for quite a while. The oil keeps heat down and saves your cutting edges for months not weeks. It also prevents pet dander from melting and creating orange-colored buildup on your cutting surface. Whenever you put a blade on your clipper follow with a tiny drop of oil in the middle of the teeth. ■